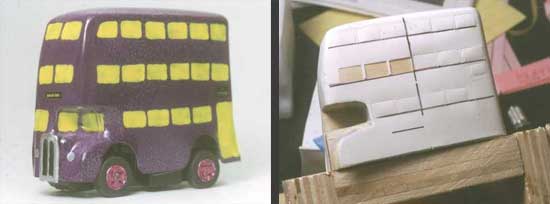
How I Modeled The Knight Bus from Harry Potter and The Prisoner Of Azkeban
Using Wood Carving, Vacuum Forming, Plastic Shaping, Painting, Special Building Jigs, Model‑Making and Custom Appliques

Chapter 4: The Windows, Wheel Wells and Grille
From the previous chapter:
There was no drivers side indentation worth mentioning. But, the body shape is formed!
Since I was feeling listless, I felt I needed some quick satisfaction. So I started to work on the details that would allow me to vacuum form over a pattern that contained the outlines of the windows, wheel wells and grille.
I fitted the vacuum formed body shape over the wood pattern and cut out the windows. I built a little work prop that would hold up the plastic covered pattern so that I could work on the plastic — well, almost comfortably.

I found an architectural template that had the correct shape for the windows. I ran a dissection needle (discarded from a kid’s microscope set) around the inside of the template to score a line. It was then easy to pick out the window. Again, I am planning to form over this window pattern to give me a nice line to paint up to.
Here’s a little further on:

The photo above also shows the wheel well shapes. When I form over these shapes I will use these as a guide for cutting out the openings.

I also cut out and shaped the front grille — The top part of the above photo above shows the reference pic. I used a piece of .040” styrene cut and sanded to shape.

Here’s a test shot to see if my “window” concept worked. I planned on simply dumping some paint, letting the slight raised pattern guide the paint... well, this part of it worked! It looked good.

To be clear, in this chapter I described the creation of a plastic pattern (A) that I will place over the original wood pattern (B) to vacuum form a shape (C) with more details than the wooden pattern alone.


